What Are the Key Steps in Sauna Construction?
Building your own sauna can be a rewarding project that offers relaxation and health benefits. Whether you're a DIY enthusiast or new to construction projects, understanding the key steps involved is essential for success. Let’s walk through the essential stages of sauna construction.
Step 1: Choose the Right Location
Consider the available space, access to water and electricity, and necessary ventilation. Deciding on the location is crucial for a well-functioning sauna.
When selecting the location for your sauna, think about convenience and accessibility. An ideal spot should be easily reachable from your main living area, especially during cold or inclement weather. The closer the sauna is to a shower or bathroom facilities, the more comfortable your post-sauna experience will be.
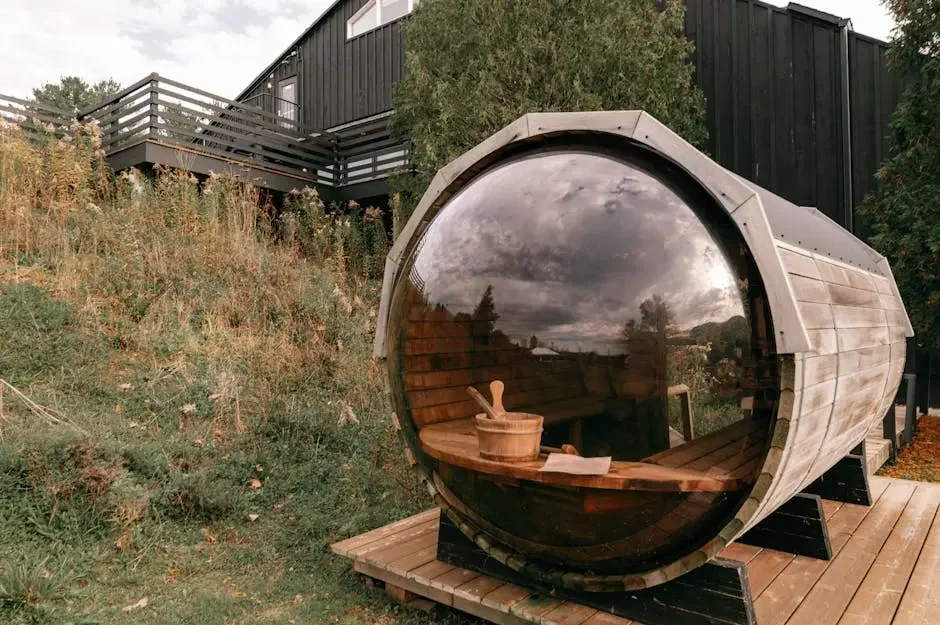
Don't forget to assess outdoor options. An outdoor location can provide a unique natural setting and allow for greater flexibility in sizing and design. However, it is vital to ensure that your chosen spot is protected from the elements and complies with local building codes and regulations.
Step 2: Decide on the Type of Sauna
Will it be traditional, infrared, or steam? Your choice will affect the materials and tools required, as well as installation time and costs.
Traditional saunas heat the air with a wood-burning or electric heater. They're known for their intense heat and dry air. Infrared saunas, on the other hand, use infrared lamps to heat your body directly, offering a milder experience and lower temperatures. Steam saunas generate steam to create a humid environment.
Each type of sauna has its distinct benefits. Traditional saunas often provide a more immersive experience, while infrared saunas are praised for their gentle, detoxifying properties. A steam sauna can be a great choice if you enjoy the feel of moist heat, which can be beneficial for your respiratory system.
Step 3: Gather Materials and Tools
Ensure you have all necessary materials, including wood, insulation, and a heat source. A comprehensive list helps avoid interruptions during construction.
Wood selection is critical for your sauna's performance and longevity. Select high-quality woods like cedar or hemlock, which can withstand high temperatures and humidity without warping. These woods naturally repel moisture and smell pleasant, enhancing your sauna experience.
Alongside wood, proper insulation materials are imperative. They ensure that heat is retained, making your sauna more energy-efficient. Fiberglass and rigid foam insulation are popular choices due to their effectiveness and ease of installation.
Step 4: Construct the Sauna Frame
Building a sturdy frame is foundational. It sets the shape and supports the structure, ensuring the sauna is safe and durable.
The frame provides a backbone for your sauna, so precision and sturdiness are essential. Start by outlining the base and raising the walls with durable lumber. Ensure that all corners are perfectly squared, which will make the rest of the build more seamless.
Before securing the walls, double-check the measurements against your design plan. Any discrepancies found at this stage can be corrected more easily, saving you from future headaches during the finishing phases.
Step 5: Insulate and Install Vapor Barrier
Proper insulation keeps heat in and provides energy efficiency. Adding a vapor barrier prevents moisture damage over time.
Insulation is key in maintaining consistent temperatures, especially in cooler environments. Its primary role is to trap heat inside the sauna, reducing energy usage and promoting a steady, relaxing atmosphere.
Don't overlook the importance of a vapor barrier. Its role in preventing moisture from seeping into the walls cannot be understated, as moisture can lead to mold and structural decay over time. Using a high-quality plastic sheeting or foil vapor barrier will extend the lifespan of your sauna.
Step 6: Add Sauna Benches and Heater
Install benches for seating and place the heater in a strategic spot for maximum efficiency. Make sure to follow safety guidelines.
To create a comfortable seating arrangement, consider building tiered benches. This allows users to choose their preferred heat level, as temperatures vary with height. Use the same quality wood as the rest of your sauna to create a cohesive look.
The placement of the heater is vital for achieving even heat distribution. Whether you choose an electric or wood-burning heater, ensure it's installed according to the manufacturer's specifications for optimal performance and safety.
Step 7: Finish with Wood Paneling
Choose attractive, heat-resistant wood like cedar or hemlock for the interior. This gives the sauna its final appearance and adds to the ambiance.
Wood paneling not only enhances the aesthetic appeal but also assists in temperature regulation. The natural properties of quality wood, such as its ability to repel moisture and resist high temperatures, make it an ideal choice for sauna interiors.
As you finish with wood paneling, consider incorporating design elements that reflect your personal style. Whether it's a modern, minimalist approach or a rustic, traditional design, ensure it aligns with the overall ambiance you wish to create.
Enjoy Your Self-Made Sauna
Constructing a sauna can be a fulfilling project with numerous benefits for your mind and body. By following these key steps, you're setting the groundwork for a relaxing and efficient space that will serve you for years. Dive in and enjoy the warmth of your self-made sanctuary